
Lot 39 Case Study
- Feb 24
- 8 min read
Updated: Apr 20

Norwegian Hollow Phase 1: Exterior Trim & Building Envelope Remediation in Vancouver, WA 98682

Article designed & written by Tim Holley : Residential Remodels at StraightLine Exteriors
Norwegian Hollow in Vancouver, Washington

If you live in Phase 1 of the Norwegian Hollow subdivision in Vancouver, Washington - you have likely noticed peeling paint, softening wood, or deteriorating trim around your windows, corners & doors. At StraightLine Exteriors, we were recently mobilized at Lot 39 to address that exact issue. What often appears from the street to be a simple cosmetic failure is, in reality, a systemic vulnerability in the home's building envelope.
Norwegian Hollow : SPF Timeline

Because these homes were constructed in the same phase using identical builder-grade materials and flashing techniques, they are reaching their failure horizon simultaneously.
Norwegian Hollow : Phase One Build Dates

Lot 39 : Remediation — This case study documents our destructive analysis of the original SPF (spruce-pine-fir) wood trim, the hidden moisture intrusion we uncovered, and our engineered restoration protocol for repair & prevention.
Your Key Takeaways From This Article
1) Thinning paint lead to our homeowner's caulking sealant failure, which allowed for moisture intrusion into the window trim substrate material - and potentially the rest of the building envelope.
2) The window trim substrate material was SPF (also known as Spruce-Pine-Fir), which is a wood product that readily absorbs moisture when left untreated. Most of this product is considered 'untreated' because the treatment in this scenario is paint and only covers the exterior portion — just 1 of the 6 sides.
3) The moisture intrusion quickly degraded the SPF product and penetrated the trim layer, reaching the WRB (Weather Resistive Barrier) layers behind the trim. The WRB behind the trim & siding were DuPont™ Tyvek® HomeWrap® and DuPont™ Tyvek® Flashing Tape.
4) We feared the moisture may have penetrated beyond the WRB and into the sheathing layer behind it (OSB Plywood) and potentially onto the framing and insulation (Douglas Fir 2"x6" Framing). Luckily, the framing was spared and only the OSB Plywood had some surface degradation. After conferring with the homeowner (presenting options and pricing) we determined the surface damage to the plywood wasn't enough to warrant the additional cost of replacement. We treated the plywood for mold before installing new material.
5) The DuPont™ Tyvek® Flashing Tape and HomeWrap® were overwhelmed by the amount of moisture intrusion, allowing damage to the layers they're meant to protect, but the damage was minimal and the Tyvek® products helped to avoid any extra costs for our homeowner.
Conclusion : The moisture intrusion was considerably inhibited by the DuPont™ Tyvek® Flashing Tape so it barely moved passed the DuPont™ Tyvek® HomeWrap WRB layers. No additional work or costs were necessary to address hidden rot repair issues.
Wall Construction : Simplified

Reinforce your foundational knowledge by learning more about the configurations & products contained in this article
Wall Construction : Simplified knowing the layers of your wall and how they reinforce and protect each other is key to understanding the risks & rewards of exterior design. From foundation to flashing each plays a part.
SPF aka Whitewood SPF (Spruce-Pine-Fir) materials, one of the exterior wood-based products known as 'whitewood'. This in-depth look at a widely used Builder-Grade material is a resource which becomes particularly meaningful for purchasing a home constructed within the past 15 years, as it's likely present on the home.
Sherwin-Williams : Paint Product Comparison Chart

The difficult task of preventing moisture intrusion from affecting the home's most vulnerable layers mainly rests on an aging coat of paint and the drying caulk beneath it, each applied 10 years ago. These aging finishes were in the spotlight after our homeowner and a guest noticed the deteriorating condition of their window trim. Paint is the first line of defense against moisture intrusion through your home's walls - and keeping the right amount of paint on your walls will help protect the entire building envelope. Paint is the best way to extend a product's lifecycle. To learn more about Sherwin-Williams visit STIR
Norwegian Hollow : Lot 39 Targeted Caulk-Joints

Paint is the only protection caulk generally receives - and caulking is common throughout a home. It's utilized at terminations of siding into trim — sometimes in multiple layers. Above is an example of the caulk joints contained just in the window trim repair area.
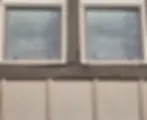
Norwegian Hollow : Phase One Southern Exposure

Latex paint thins and dries over time providing less protection. This is due mainly to UV exposure, high temperatures and the freeze/thaw cycles our homes experience. Spring temperature cycles can be particularly taxing in Vancouver & Portland due to the cold, wet evenings and warm, sunny afternoons. A good visual example of this is the when morning dew, or rainfall, turns to steam in the afternoon sun — this can usually be seen on asphalt roads, rooftops and exterior walls. Southern Facing surfaces tend to see the most dramatic changes in temperature.
Norwegian Hollow : Lot 39 Window Trim Repair
Thinning paint, caulk failures and moisture intrusion into the SPF trim product created the issues shown above. The degradation of the wood-based product is clearly visible, but what we were more concerned with was the effect on the moisture to the hidden layers of the wall configuration. Top of mind were the additional wood-based products hidden from view, ie. Plywood Sheathing.
Common Moisture Intrusion : Outer & Inner Layers

We often find minimal exterior issues point to deeper, hidden problems. The photos shown above are not from this project, but serve to show as an example of how small indicators on the surface of the wall can easily be overlooked. In the photo on the left, the window's designed drainage (weep hole) is creating green build-up on the window trim and is occurring in a vulnerable caulk-joint (which runs horizontally between the window frame and the trim below it.
Window Trim : Proper Configuration

You can see in the comparison above how a horizontal cut can create a ledge, aiding in moisture retention, while a vertical cut aids in moisture drainage. The horizontal surfaces create a space for moisture to be retained and because the cut edge of vertical trim is adjoining it, there's a capillary function which absorbs water vertically into the adjoining piece - essentially 'sucking up' the moisture into the previously unaffected trim. Some manufacturer's warranty specifications dictate the need for vertical cuts in order for coverage to apply to the installed products.
Norwegian Hollow : Lot 39 Trim Removal

During removal we were relieved to see that there was a layer of flashing membrane tape behind the window trim. In this scenario the product used was DuPont™ Tyvek® Flashing Tape. It was used in conjunction with the DuPont Tyvek® HomeWrap® — a product carrying a 10 year warranty for homeowners. This home was built 11 years ago, but WRB's (Weather Resistive Barriers) generally continue to perform well as long as they are shielded from UV rays and their surfaces remain undamaged from penetrations, and their seams remain sealed.
SPF Trim : Saturation and Decay

SPF (Spruce-Pine-Fir) Trim Standard SPF is hygroscopic, meaning it readily absorbs moisture from the environment. Once the moisture content exceeds 20–30%, it creates an ideal habitat for wood-destroying fungi. If untreated SPF stays wet, it can begin to rot in as little as three years.
DuPont™ Tyvek® HomeWrap® Saturation

After uncovering the OSB Plywood sheathing layer behind the WRB we were again relieved to find that even though moisture had fully saturated the WRB and affected the OSB plywood behind it — the damage was minimal. The WRB and OSB were no longer wet to the touch, but the OSB did have some surface degradation. After bringing what we found to the homeowner's attention we explored the options for correction.
Option 1 : Cut out and replace the area of affected OSB plywood. This would've entailed removing the section of Batten Board siding and WRB to remove the plywood. There would be an additional cost for the Batten Board replacement.
Option 2 : Treat the affected plywood for mold, which would kill any spores and prevent further mold growth from occurring. Without additional moisture the mold will not return.
Decision : Option 1, while thorough, was deemed unnecessary due to the minimal nature of damage on the OSB Plywood. We were able to treat the surfaces for mold and continue.
Gutter Termination, Band Board & Flashing

Our next target was at the top of the window. Multiple products and moisture management systems came together in a vulnerable configuration that we wanted to improve upon. The existing system could be improved and we knew that if the current system failed it could affect the entirety of the wall below.
Kick-Out Flashing Upgrade

We increased the size of the Kick-Out Flashing to better serve our homeowners. Now, the designed drainage of the building envelope will be able to handle more moisture. A heavier flow during a Summer downpour (which seem to be more and more common in our area) as well as standing snow and further snowmelt (which is becoming more rare each year).
Kick-Out Flashing Upgrade : Sealed Installation

Lastly, we were able to verify an additional (and crucial) hidden piece of metal flashing was properly installed behind the cascading layers of Metal Flashings, WRB and Waterproof Membrane Tapes. We spray-sealed the untreated rafter tails (framing lumber) that were previously covered by the gutter and installed the larger kick-out flashing to be properly interwoven below and between the other elements to provide maximum redundancy and drainage for the building envelope.
New Trim : James Hardie® Trim (Fiber Cement)

We were able to complete the rest of the project without issue. We replaced all wood-based products with new James Hardie® Fiber Cement when applicable. The benefits of this upgrade can be found not only in our installation techniques - but the Hardie® products themselves are superior to wood-based products in both performance & warranty coverage. You can learn more about James Hardie® Products by visiting their site here.
James Hardie® Fiber Cement Benefits

Now, we will return in Spring / Summer to paint the home using Sherwin-Williams™ SuperPaint®. If you're a concerned homeowner reading this, just know that the most cost effective way of extending the lifecycle of your siding is to keep it well painted. If you're interested in learning more about the cost to paint your home contact us anytime to talk. StraightLine Exteriors 360-718-8694
Scheduled Late Spring / Early Summer : Paint & Stain
